|
Muzzle Blasts Online |
|
...for the muzzleloading enthusiast |
|
The muzzleblasts.com domain, subdomains, content, etc., are neither affiliated with the NMLRA nor its paper magazine Muzzle Blasts |
|
Muzzle Blasts Online |
|
|
|
|
|
|
Ramrod Rights and Wrongs
Scientific studies on the physical properties of native American woods indicate that there are lots of good ramrods out there where you might least expect them.
Of all the tools and accessories relating to the use of muzzleloading firearms, the lowly ramrod gets the hardest use and the most abuse. In its various forms, the ramrod has, throughout history, been used as a skewer for roasting meat over an open fire, as a muzzle rest for long range shooting, possibly as a hickory switch to punish errant children, and sometimes even accidentally shot. This last practice hurts on both ends of the rifle; a friend of mine inadvertently fired his ramrod down range during a timed match; he promised his badly bruised shoulder that he would never do that again! Considering such potential for misuse, it is little wonder that few original ramrods survive to grace the fine old rifles they once served so well.
In any case and whatever the use, the ramrod must be made of strong material. Steel and wood are traditionally used for ram rod shafts, with steel being confined largely to military weapons. The traditional wood for ramrods has been hickory. Most muzzleloaders probably have not considered other woods even though some good ones might be made from woods often overlooked. High capacity for loads parallel to the grain is one good indicator of suitability for ramrods when you consider that some ball/patch combinations require in excess of 100 psi to start them down the barrel (the author measured this by bathroom scale deflection and calculated the value based on cross-sectional area of the ball/patch combination). Having the ramrod shear under such a load will produce sharp ends which can result in serious injury to hands or face, so the shearing strength under loads parallel to the grain is also important to consider in ramrod wood selection.
Some of the properties of native woods relative to their suitability for ramrods are shown in Table One (Reviewer's note: The reader is cautioned that test results may not always be applicable. This is particularly so when the test is done on a piece of wood much larger in cross section than that of a ramrod. Or, if a ramrod is smaller in diameter than the thickness of the annular rings of a specific species, the test results won't apply to the use of that species for a ramrod. Commercial tests often conclude that curly woods are just as strong as straight grain woods. This is true of large samples, but when the sample gets to be thinner than the amplitude of the curl, the results are completely wrong. This would apply to thin cross sections of forestocks as well as to small diameter ramrods.) It is no surprise that the hickories have high compression and shear strengths (although black locust beats hickories in both categories). However, one of the big surprises is that birch (the dowels you find in hardware stores are often made of birch) is close to the hickories in both categories. The elasticity of the wood is also important since you want a ramrod that will resist deflection and return to its original shape (one of my early attempts at using a synthetic polymer ramrod was like trying to push cooked spaghetti through a keyhole). According to the ``Wood Handbook,'' (Agricultural Handbook no. 72, 1987) which rates the modulus of elasticity calculated from a simply-supported center-loaded beam, birch is more elastic than many of the other hardwoods such as ash, beech, elm, and nearly equals hickory and locust. Although the common hardware store dowel has been dismissed by previous writers as unsuitable for ramrods, yellow birch dowels would probably make excellent ramrods if carefully selected for grain. Another surprise from Table One is that longleaf and slash pine rate right up there with most of the hardwoods and beat some of them in both compression strength and shearing strength. Furthermore, they are more elastic than all the hardwoods except birch, hickory, and locust. If the top ten woods were rated in decreasing order of combined strengths (compression and shear), we would have to put locust first (although I bet that osage orange would rival it for first place if comparable data were available), followed by shagbark hickory, pignut hickory, sugar maple, yellow birch, longleaf pine, slash pine, white oak, white ash, and beech.
|
|
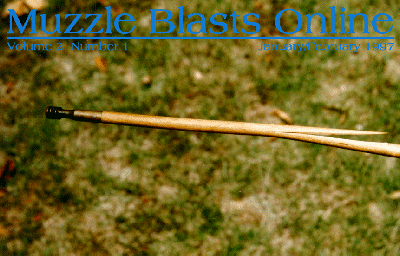
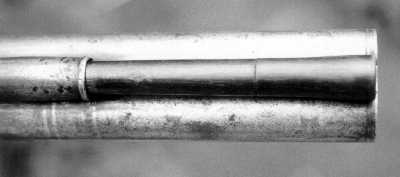
Figure 1: A hickory rod can be stained to a jet black color using water soluble aniline dye. |
|
|
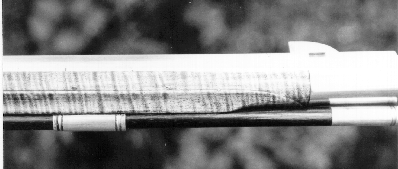
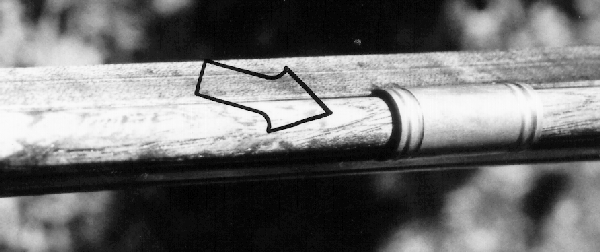
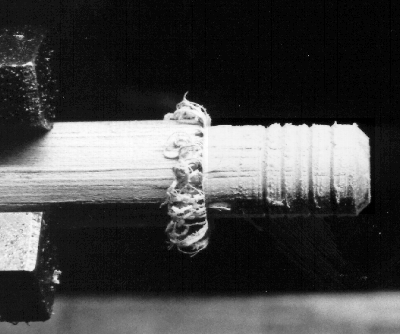
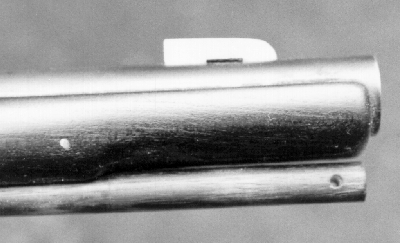
Figure 2: Grain run-out in a ramrod is a failure waiting to happen. |
Whatever its composition, the strength of the ramrod is limited by the caliber of the rifle. Commercial ramrod blanks come in fractional sizes: 5/16, 3/8, 7/16, and 1/2 inch being nominal diameters. Unfortunately, getting truly round blanks is like looking for an honest politician or a cheap neurosurgeon.

|
|
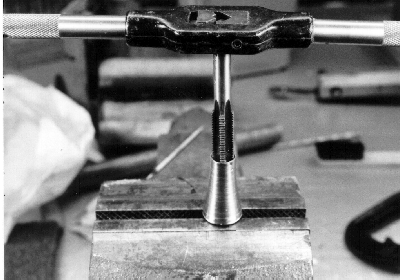
Fig. 3. Ramrod sizing can be done by driving the rod through a hole in a steel plate. |
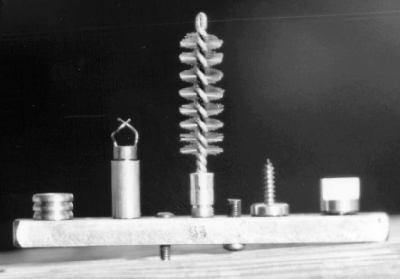
A ramrod should be more than just a stick to seat a bullet, although some ramrods (which are probably not the originals) I have seen on old rifles qualify for little more than that. Ramrods currently seen on most rifles, new and old, seem to be constructed bass ackwards, with the ball-seating cup on the muzzle end when in place in the thimbles. This means that every time you load, you must reverse ramrod direction. That can be cumbersome when you are in a hurry, particularly in dense brush which can snag the rod every time you reverse ends. When the rifle is in normal loading position, the ball-seating cup is better on the lower ramrod end. The radius of the cup should approximately fit the ball: I use a 5/16" ball end mill for .32 caliber; 3/8" for .36 and .40 caliber cups; 7/16" for .45; 1/2" for .50; and 5/8" for .54, .58, and .62. This fitting is best threaded for 8-32 to accept most commercial ramrod tools. And there are a lot of them! There are straight cleaning jags, as well as ones tapered or stepped to swab specific types of breeches. There are bore brushes for every caliber, as well as collared ball pullers, tow worms, patch retrievers, and breech plug face scrapers. Looking for one of these out of a loose assortment in a shooting bag would be like trying to find the spare house key in the wife's purse.
|
|
Figure 4: The ramrod accessory work station as used by Tom Harbin and the Rangers. |

|
|
Figure 5: A cleaning jag can be incorporated into the end of the ramrod tip, but the cupped end is hard on the hand. The flared and rounded tip is more comfortable. |
|
|
Figure 6: Cutting a few threads in a tip will hold epoxy much better. |
Jaeger rifles and muzzleloading scatterguns of European origin often had horn tips on the muzzle end of the ramrod
|
|
Figure 7: Original horn tip on a ramrod in a Prussian scattergun. |
|
|
Figure 8. Grooving the ramrod in the lathe will help it hold glue better. |
|
|
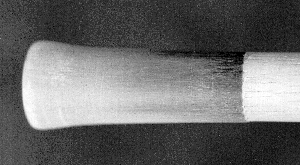
Fig. 9. This horn tip made by the author has a pronounced flare at the end. |
I also taper the tip about 2-3 to create a flare at the end as shown in Figure 9. This can be overdone, with the result that small bits of horn will gradually shed off the front end. The tapering and final shaping can usually best be completed after the tip is glued on with epoxy, since you don't have a lot of gripping surface for the lathe to hold the unmounted tip. Cup the large end using a ball end mill or router bit of the appropriate size if it is for a rifle, but leave it flat if it is to be used in a scattergun. Again, don't overdo the cupping, or it will weaken the edge of the horn excessively.
On some rifles, it just doesn't seem appropriate to have all that fancy a ramrod tip showing. A plain alternative is shown for a trade gun in
|
|
Figure 10: Ramrods on trade guns may have no tip with just a hole through the end. |
One final reminder: when wood grows, it incorporates a small amount of silica into its tissues which is abrasive enough to eventually cause bore wear, particularly at the muzzle. Before I was aware of this consideration, I gradually ruined the accuracy of several fine barrels (as I am sure the old timers did also over their lifetimes). At events where authenticity is not required, leave the wooden rod in its thimbles and use a 1/4" or 5/16" stainless steel rod with a plastic collar to protect the muzzle.